I’m trying to set up SecurityOnion on OpenNebula KVM from an ISO. First, I’m presented with the welcome screen:

I then select Install Security Onion 2.4.111 and immediately get a kernel panic:

Any suggestions?
Thanks in advance!
I’m trying to set up SecurityOnion on OpenNebula KVM from an ISO. First, I’m presented with the welcome screen:
I then select Install Security Onion 2.4.111 and immediately get a kernel panic:
Any suggestions?
Thanks in advance!
Hello,
A bit more context is needed to avoid wild guessing…
What is the VM metadata of the running VM? The output of the onevm show -x 216 command should help.
Best Regards,
Anton Todorov
I just tested the installation from iso.
TL;DR: you’d need to define a relatively new CPU Model for installation to work.
The installation is based on OracleLinux 9.2 which is RHEL9 derivate that requires CPU capabilities x86-64-v2. More details here
The supported microarchitecture levels could be seen using this command, but you’d need to install (other) Linux using the same VM definition.
root@u24onekvm2:~# /lib64/ld-linux-x86-64.so.2 --help
Usage: /lib64/ld-linux-x86-64.so.2 [OPTION]... EXECUTABLE-FILE [ARGS-FOR-PROGRAM...]
...
Subdirectories of glibc-hwcaps directories, in priority order:
  x86-64-v4 (supported, searched)
  x86-64-v3 (supported, searched)
  x86-64-v2 (supported, searched)
Hint: I’ve used the trusty old Ruby Sunstone interface because the new Fireedge interface lacks configuration options and also on VM update removes bits of configuration made via other means (Ruby Sunstone, CLI tools, etc)
I hope this helps.
Best Regards,
Anton Todorov
I’m not sure how to do that in OpenNebula. Can you point me to some resources? How do I define a CPU architecture in a VM template?
Thank you in advance!
It is a big installation (12GB iso image) that require minimum 100GB on the disk… it could take time to do the installation. In the loader menu with he different option you could hit [tab] to edit the exact command line, then delete the last quiet and hit enter to proceed with the change. this way you’ll have more information what is going on
Sorry for the late reply, but I’m just now returning to this.
Thanks for the reply. Indeed, removing quiet shows some additional options, and it looks like the installation stops here:
I’ve tried setting things up, but I get this:
I’m not quite sure what it means, but I suspect that there’s an issue with the Installation Destination since it says no disk is selected. When I try to set this up, for some reason, it still doesn’t detect the drive.
Here’s the disk that I have for this VM:
I’d very much appreciate it if you could point me to where the problem might be! Thanks in advance!
Hello,
Indeed, it looks like an issue with the VM disk, but the partial screenshots do not help.
Please provide the oneimage show -x 'securityonion-2.4.111-os' and onevm show -x $VM_ID.
I had no such issues when testing the installation, but in my setup, I used an empty, non-persistent image for the root disk, and the installation cdrom was the second disk in the VM. So could you try the same? If it is okay, you could use the save-as option on the OS disk to clone as a new image in the image datastore.
Best Regards,
Anton Todorov
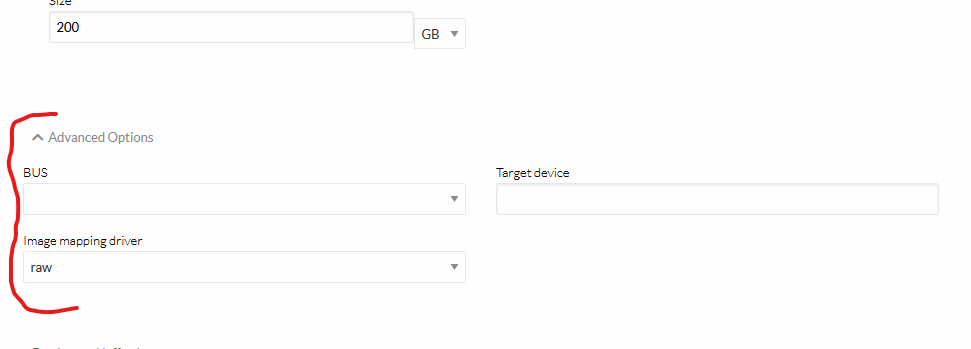
Ok, I’ve created a fresh drive of 200 GB with RAW driver (had qcow2 before). Removed the quiet flag and now didn’t hit any issues with disks. But the installation still hangs at the black screen with blinking cursor. Below I attach the config of the securityonion-2.4.111-os and VM itself:
OS Image:
oneimage show -x 'securityonion-2.4.111-os'
<IMAGE>
  <ID>151</ID>
  <UID>0</UID>
  <GID>0</GID>
  <UNAME>oneadmin</UNAME>
  <GNAME>oneadmin</GNAME>
  <NAME>securityonion-2.4.111-os</NAME>
  <PERMISSIONS>
    <OWNER_U>1</OWNER_U>
    <OWNER_M>1</OWNER_M>
    <OWNER_A>0</OWNER_A>
    <GROUP_U>0</GROUP_U>
    <GROUP_M>0</GROUP_M>
    <GROUP_A>0</GROUP_A>
    <OTHER_U>0</OTHER_U>
    <OTHER_M>0</OTHER_M>
    <OTHER_A>0</OTHER_A>
  </PERMISSIONS>
  <TYPE>2</TYPE>
  <DISK_TYPE>0</DISK_TYPE>
  <PERSISTENT>0</PERSISTENT>
  <REGTIME>1739865632</REGTIME>
  <SOURCE><![CDATA[/var/lib/one//datastores/1/125b540797f6a4ad3109b2101c427bd5]]></SOURCE>
  <PATH><![CDATA[]]></PATH>
  <FSTYPE><![CDATA[raw]]></FSTYPE>
  <SIZE>204800</SIZE>
  <STATE>2</STATE>
  <RUNNING_VMS>1</RUNNING_VMS>
  <CLONING_OPS>0</CLONING_OPS>
  <CLONING_ID>-1</CLONING_ID>
  <TARGET_SNAPSHOT>-1</TARGET_SNAPSHOT>
  <DATASTORE_ID>1</DATASTORE_ID>
  <DATASTORE>default</DATASTORE>
  <VMS>
    <ID>219</ID>
  </VMS>
  <CLONES/>
  <APP_CLONES/>
  <TEMPLATE>
    <DEV_PREFIX><![CDATA[sd]]></DEV_PREFIX>
    <DRIVER><![CDATA[raw]]></DRIVER>
  </TEMPLATE>
  <SNAPSHOTS>
    <ALLOW_ORPHANS><![CDATA[NO]]></ALLOW_ORPHANS>
    <CURRENT_BASE><![CDATA[-1]]></CURRENT_BASE>
    <NEXT_SNAPSHOT><![CDATA[0]]></NEXT_SNAPSHOT>
  </SNAPSHOTS>
</IMAGE>
VM:
onevm show -x 219
<VM>
  <ID>219</ID>
  <UID>0</UID>
  <GID>0</GID>
  <UNAME>oneadmin</UNAME>
  <GNAME>oneadmin</GNAME>
  <NAME>securityonion-2.4.111-instance</NAME>
  <PERMISSIONS>
    <OWNER_U>1</OWNER_U>
    <OWNER_M>1</OWNER_M>
    <OWNER_A>0</OWNER_A>
    <GROUP_U>0</GROUP_U>
    <GROUP_M>0</GROUP_M>
    <GROUP_A>0</GROUP_A>
    <OTHER_U>0</OTHER_U>
    <OTHER_M>0</OTHER_M>
    <OTHER_A>0</OTHER_A>
  </PERMISSIONS>
  <LAST_POLL>1739868860</LAST_POLL>
  <STATE>3</STATE>
  <LCM_STATE>3</LCM_STATE>
  <PREV_STATE>3</PREV_STATE>
  <PREV_LCM_STATE>3</PREV_LCM_STATE>
  <RESCHED>0</RESCHED>
  <STIME>1739865798</STIME>
  <ETIME>0</ETIME>
  <DEPLOY_ID>3c50fac3-2249-4552-a0dd-dabad4e32677</DEPLOY_ID>
  <MONITORING>
    <CPU><![CDATA[3.0]]></CPU>
    <DISKRDBYTES><![CDATA[644062352]]></DISKRDBYTES>
    <DISKRDIOPS><![CDATA[174735]]></DISKRDIOPS>
    <DISKWRBYTES><![CDATA[0]]></DISKWRBYTES>
    <DISKWRIOPS><![CDATA[0]]></DISKWRIOPS>
    <DISK_SIZE>
      <ID><![CDATA[0]]></ID>
      <SIZE><![CDATA[12503]]></SIZE>
    </DISK_SIZE>
    <DISK_SIZE>
      <ID><![CDATA[1]]></ID>
      <SIZE><![CDATA[204801]]></SIZE>
    </DISK_SIZE>
    <DISK_SIZE>
      <ID><![CDATA[2]]></ID>
      <SIZE><![CDATA[1]]></SIZE>
    </DISK_SIZE>
    <ID><![CDATA[219]]></ID>
    <MEMORY><![CDATA[2377840]]></MEMORY>
    <NETRX><![CDATA[1863]]></NETRX>
    <NETTX><![CDATA[0]]></NETTX>
    <TIMESTAMP><![CDATA[1739868860]]></TIMESTAMP>
  </MONITORING>
  <TEMPLATE>
    <AUTOMATIC_DS_REQUIREMENTS><![CDATA[("CLUSTERS/ID" @> 0)]]></AUTOMATIC_DS_REQUIREMENTS>
    <AUTOMATIC_NIC_REQUIREMENTS><![CDATA[("CLUSTERS/ID" @> 0)]]></AUTOMATIC_NIC_REQUIREMENTS>
    <AUTOMATIC_REQUIREMENTS><![CDATA[(CLUSTER_ID = 0) & !(PUBLIC_CLOUD = YES) & !(PIN_POLICY = PINNED)]]></AUTOMATIC_REQUIREMENTS>
    <CONTEXT>
      <DISK_ID><![CDATA[2]]></DISK_ID>
      <ETH0_CONTEXT_FORCE_IPV4><![CDATA[]]></ETH0_CONTEXT_FORCE_IPV4>
      <ETH0_DNS><![CDATA[]]></ETH0_DNS>
      <ETH0_EXTERNAL><![CDATA[]]></ETH0_EXTERNAL>
      <ETH0_GATEWAY><![CDATA[10.50.10.1]]></ETH0_GATEWAY>
      <ETH0_GATEWAY6><![CDATA[]]></ETH0_GATEWAY6>
      <ETH0_IP><![CDATA[10.50.10.11]]></ETH0_IP>
      <ETH0_IP6><![CDATA[]]></ETH0_IP6>
      <ETH0_IP6_PREFIX_LENGTH><![CDATA[]]></ETH0_IP6_PREFIX_LENGTH>
      <ETH0_IP6_ULA><![CDATA[]]></ETH0_IP6_ULA>
      <ETH0_MAC><![CDATA[02:00:0a:32:0a:0b]]></ETH0_MAC>
      <ETH0_MASK><![CDATA[255.255.255.0]]></ETH0_MASK>
      <ETH0_METRIC><![CDATA[]]></ETH0_METRIC>
      <ETH0_METRIC6><![CDATA[]]></ETH0_METRIC6>
      <ETH0_MTU><![CDATA[]]></ETH0_MTU>
      <ETH0_NETWORK><![CDATA[10.50.10.0]]></ETH0_NETWORK>
      <ETH0_SEARCH_DOMAIN><![CDATA[]]></ETH0_SEARCH_DOMAIN>
      <ETH0_VLAN_ID><![CDATA[50]]></ETH0_VLAN_ID>
      <ETH0_VROUTER_IP><![CDATA[]]></ETH0_VROUTER_IP>
      <ETH0_VROUTER_IP6><![CDATA[]]></ETH0_VROUTER_IP6>
      <ETH0_VROUTER_MANAGEMENT><![CDATA[]]></ETH0_VROUTER_MANAGEMENT>
      <NETWORK><![CDATA[YES]]></NETWORK>
      <SSH_PUBLIC_KEY><![CDATA[]]></SSH_PUBLIC_KEY>
      <TARGET><![CDATA[hdb]]></TARGET>
    </CONTEXT>
    <CPU><![CDATA[8]]></CPU>
    <CPU_MODEL>
      <MODEL><![CDATA[host-passthrough]]></MODEL>
    </CPU_MODEL>
    <DISK>
      <ALLOW_ORPHANS><![CDATA[NO]]></ALLOW_ORPHANS>
      <CLONE><![CDATA[NO]]></CLONE>
      <CLONE_TARGET><![CDATA[SYSTEM]]></CLONE_TARGET>
      <CLUSTER_ID><![CDATA[0]]></CLUSTER_ID>
      <DATASTORE><![CDATA[default]]></DATASTORE>
      <DATASTORE_ID><![CDATA[1]]></DATASTORE_ID>
      <DEV_PREFIX><![CDATA[hd]]></DEV_PREFIX>
      <DISK_ID><![CDATA[0]]></DISK_ID>
      <DISK_SNAPSHOT_TOTAL_SIZE><![CDATA[0]]></DISK_SNAPSHOT_TOTAL_SIZE>
      <DISK_TYPE><![CDATA[FILE]]></DISK_TYPE>
      <DRIVER><![CDATA[raw]]></DRIVER>
      <IMAGE><![CDATA[securityonion-2.4.111]]></IMAGE>
      <IMAGE_ID><![CDATA[149]]></IMAGE_ID>
      <IMAGE_STATE><![CDATA[2]]></IMAGE_STATE>
      <IMAGE_UNAME><![CDATA[oneadmin]]></IMAGE_UNAME>
      <LN_TARGET><![CDATA[SYSTEM]]></LN_TARGET>
      <ORDER><![CDATA[1]]></ORDER>
      <ORIGINAL_SIZE><![CDATA[12502]]></ORIGINAL_SIZE>
      <READONLY><![CDATA[YES]]></READONLY>
      <SAVE><![CDATA[NO]]></SAVE>
      <SIZE><![CDATA[12502]]></SIZE>
      <SOURCE><![CDATA[/var/lib/one//datastores/1/6d1a509bf9281250cf5215817a8207eb]]></SOURCE>
      <TARGET><![CDATA[hda]]></TARGET>
      <TM_MAD><![CDATA[ssh]]></TM_MAD>
      <TYPE><![CDATA[CDROM]]></TYPE>
    </DISK>
    <DISK>
      <ALLOW_ORPHANS><![CDATA[NO]]></ALLOW_ORPHANS>
      <CLONE><![CDATA[YES]]></CLONE>
      <CLONE_TARGET><![CDATA[SYSTEM]]></CLONE_TARGET>
      <CLUSTER_ID><![CDATA[0]]></CLUSTER_ID>
      <DATASTORE><![CDATA[default]]></DATASTORE>
      <DATASTORE_ID><![CDATA[1]]></DATASTORE_ID>
      <DEV_PREFIX><![CDATA[sd]]></DEV_PREFIX>
      <DISK_ID><![CDATA[1]]></DISK_ID>
      <DISK_SNAPSHOT_TOTAL_SIZE><![CDATA[0]]></DISK_SNAPSHOT_TOTAL_SIZE>
      <DISK_TYPE><![CDATA[FILE]]></DISK_TYPE>
      <DRIVER><![CDATA[raw]]></DRIVER>
      <IMAGE><![CDATA[securityonion-2.4.111-os]]></IMAGE>
      <IMAGE_ID><![CDATA[151]]></IMAGE_ID>
      <IMAGE_STATE><![CDATA[2]]></IMAGE_STATE>
      <IMAGE_UNAME><![CDATA[oneadmin]]></IMAGE_UNAME>
      <LN_TARGET><![CDATA[SYSTEM]]></LN_TARGET>
      <ORIGINAL_SIZE><![CDATA[204800]]></ORIGINAL_SIZE>
      <READONLY><![CDATA[NO]]></READONLY>
      <SAVE><![CDATA[NO]]></SAVE>
      <SIZE><![CDATA[204800]]></SIZE>
      <SOURCE><![CDATA[/var/lib/one//datastores/1/125b540797f6a4ad3109b2101c427bd5]]></SOURCE>
      <TARGET><![CDATA[sda]]></TARGET>
      <TM_MAD><![CDATA[ssh]]></TM_MAD>
      <TYPE><![CDATA[FILE]]></TYPE>
    </DISK>
    <GRAPHICS>
      <LISTEN><![CDATA[0.0.0.0]]></LISTEN>
      <PORT><![CDATA[6119]]></PORT>
      <TYPE><![CDATA[VNC]]></TYPE>
    </GRAPHICS>
    <MEMORY><![CDATA[16384]]></MEMORY>
    <NIC>
      <AR_ID><![CDATA[0]]></AR_ID>
      <BRIDGE><![CDATA[ovsbr-citef]]></BRIDGE>
      <BRIDGE_TYPE><![CDATA[openvswitch]]></BRIDGE_TYPE>
      <CLUSTER_ID><![CDATA[0]]></CLUSTER_ID>
      <IP><![CDATA[10.50.10.11]]></IP>
      <MAC><![CDATA[02:00:0a:32:0a:0b]]></MAC>
      <NAME><![CDATA[NIC0]]></NAME>
      <NETWORK><![CDATA[Transit-Network]]></NETWORK>
      <NETWORK_ID><![CDATA[1]]></NETWORK_ID>
      <NETWORK_UNAME><![CDATA[oneadmin]]></NETWORK_UNAME>
      <NIC_ID><![CDATA[0]]></NIC_ID>
      <SECURITY_GROUPS><![CDATA[0]]></SECURITY_GROUPS>
      <TARGET><![CDATA[one-219-0]]></TARGET>
      <VLAN_ID><![CDATA[50]]></VLAN_ID>
      <VN_MAD><![CDATA[ovswitch]]></VN_MAD>
    </NIC>
    <OS>
      <BOOT><![CDATA[disk0]]></BOOT>
    </OS>
    <SECURITY_GROUP_RULE>
      <PROTOCOL><![CDATA[ALL]]></PROTOCOL>
      <RULE_TYPE><![CDATA[OUTBOUND]]></RULE_TYPE>
      <SECURITY_GROUP_ID><![CDATA[0]]></SECURITY_GROUP_ID>
      <SECURITY_GROUP_NAME><![CDATA[default]]></SECURITY_GROUP_NAME>
    </SECURITY_GROUP_RULE>
    <SECURITY_GROUP_RULE>
      <PROTOCOL><![CDATA[ALL]]></PROTOCOL>
      <RULE_TYPE><![CDATA[INBOUND]]></RULE_TYPE>
      <SECURITY_GROUP_ID><![CDATA[0]]></SECURITY_GROUP_ID>
      <SECURITY_GROUP_NAME><![CDATA[default]]></SECURITY_GROUP_NAME>
    </SECURITY_GROUP_RULE>
    <TEMPLATE_ID><![CDATA[171]]></TEMPLATE_ID>
    <TM_MAD_SYSTEM><![CDATA[ssh]]></TM_MAD_SYSTEM>
    <VCPU><![CDATA[8]]></VCPU>
    <VMID><![CDATA[219]]></VMID>
  </TEMPLATE>
  <USER_TEMPLATE>
    <HYPERVISOR><![CDATA[kvm]]></HYPERVISOR>
    <INPUTS_ORDER><![CDATA[]]></INPUTS_ORDER>
    <MEMORY_UNIT_COST><![CDATA[MB]]></MEMORY_UNIT_COST>
  </USER_TEMPLATE>
  <HISTORY_RECORDS>
    <HISTORY>
      <OID>219</OID>
      <SEQ>0</SEQ>
      <HOSTNAME>opennebula-host</HOSTNAME>
      <HID>1</HID>
      <CID>0</CID>
      <STIME>1739865811</STIME>
      <ETIME>0</ETIME>
      <VM_MAD><![CDATA[kvm]]></VM_MAD>
      <TM_MAD><![CDATA[ssh]]></TM_MAD>
      <DS_ID>0</DS_ID>
      <PSTIME>1739865811</PSTIME>
      <PETIME>1739866580</PETIME>
      <RSTIME>1739866580</RSTIME>
      <RETIME>0</RETIME>
      <ESTIME>0</ESTIME>
      <EETIME>0</EETIME>
      <ACTION>0</ACTION>
      <UID>-1</UID>
      <GID>-1</GID>
      <REQUEST_ID>-1</REQUEST_ID>
    </HISTORY>
  </HISTORY_RECORDS>
</VM>
Hi,
The disk type does not matter as far as the disk boot order is selected, but as it is an OS disk by nature, you are safe to tag it as an OS disk. Regarding the advanced options, looking at the VM XML, the disk defaults to SCSI/SATA in your configuration (it has ‘sd’ as a dev prefix). The mapping driver should not be an issue, either. As you are working with qcow2 files, you’d be safe to use the qcow2 mapping driver.
The empty prompt with the blinking cursor is when the kernel and initial ramdisk are loaded so that it could take some time…
I’ve destroyed my setup but will try to re-define a testing instance in the near days.
Best Regards,
Anton Todorov
What do you mean by “some time”? I’ve left it for an hour and no change - still black screen with blinking cursor.
Is there anything else you would recommend me try?
I just tested with security Onion 2.4.120
In my setup, the black screen with the cursor lasted ~5 seconds. The entire installation process took ~10 minutes, and there were no issues.
The VM setup was as simple as possible: a 120GB volatile disk for root, the CDROM, and host-passthrough.